Start voting in the POLYAS Live Voting Cockpit
How to conduct Live Voting on the day of your meeting
- Flexible editing of ballot papers and information
- Manage the presentation of the polling questions
- Publish results directly
Open the Live Voting Cockpit
Once you have created your Live Voting in the POLYAS Online Voting Manager, the time has come to carry out the online voting and elections. You do this with the Live Voting Cockpit. To access this, you first log in to the Online Voting Manager. In the “Overview” tab you will find the link to the Live Voting Cockpit and your password. You can also use the green button “Open Live Voting Cockpit directly” to access the cockpit without having to log in again. You can use the cockpit from another device by using the link and your password to log in.
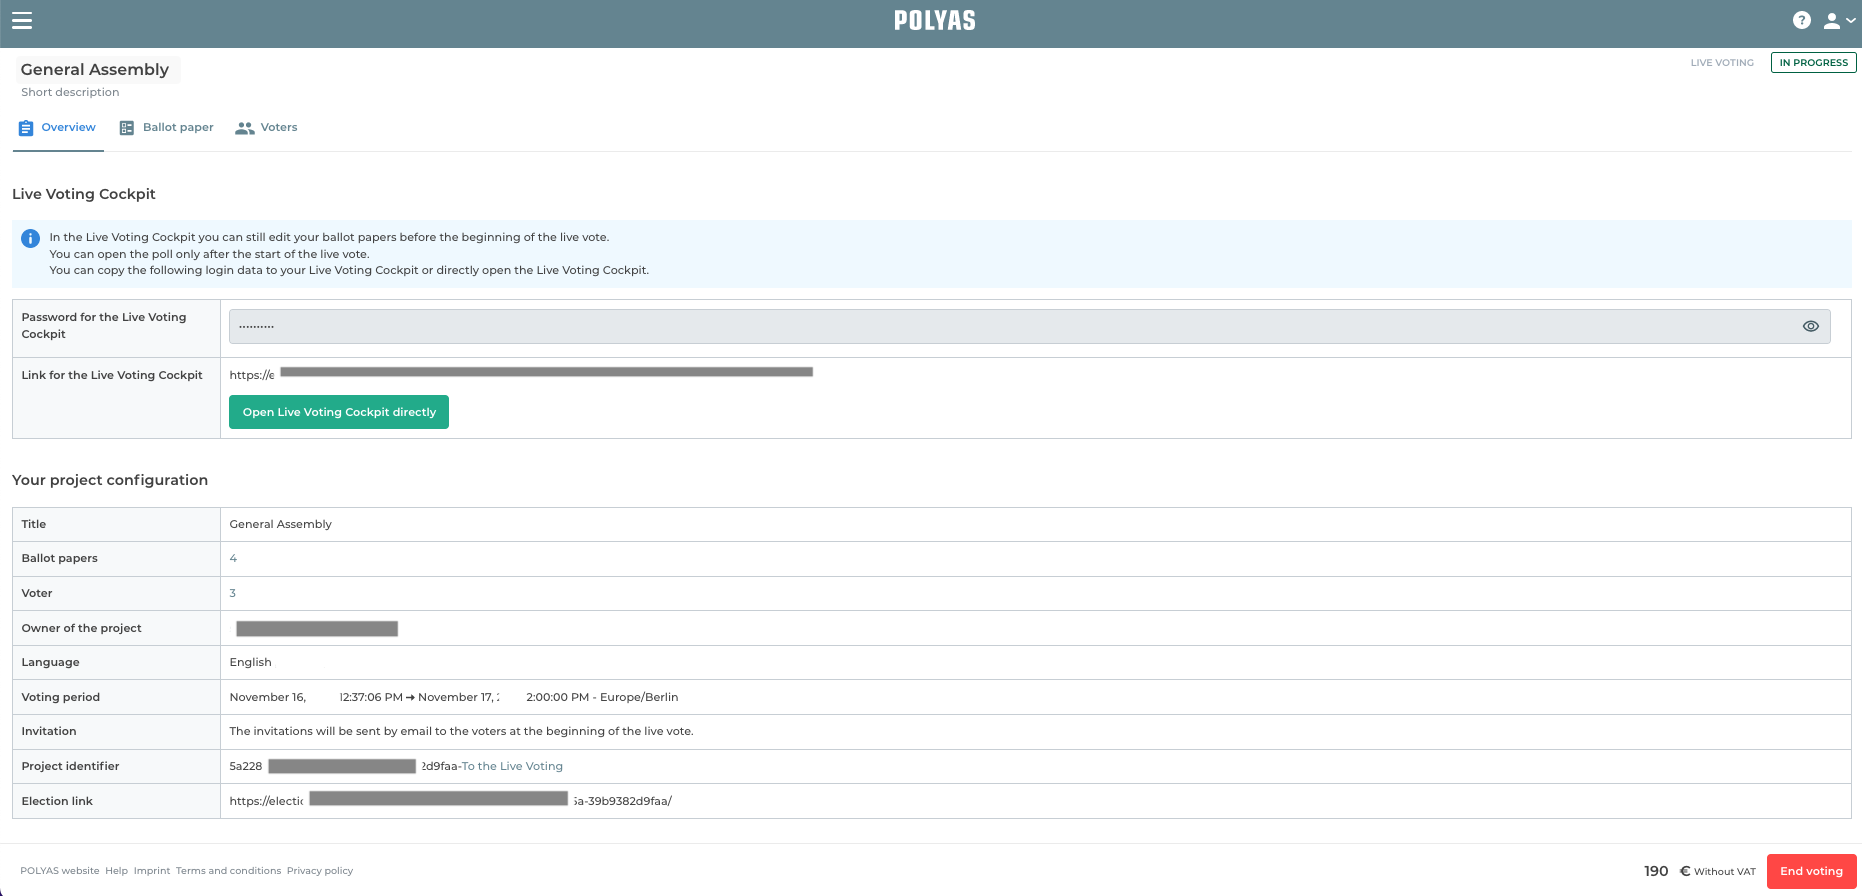
After logging in, you will first be taken to the “Overview” area. After starting your Live Voting, the number of voters who have already registered is visible at the top right of the tab bar under “Online:”.
Next, get all of your eligible voters to log into the POLYAS Live Voting System on their digital devices. If you have decided to send the invitations by e-mail, your participants will find all the information they need to register in their e-mail.
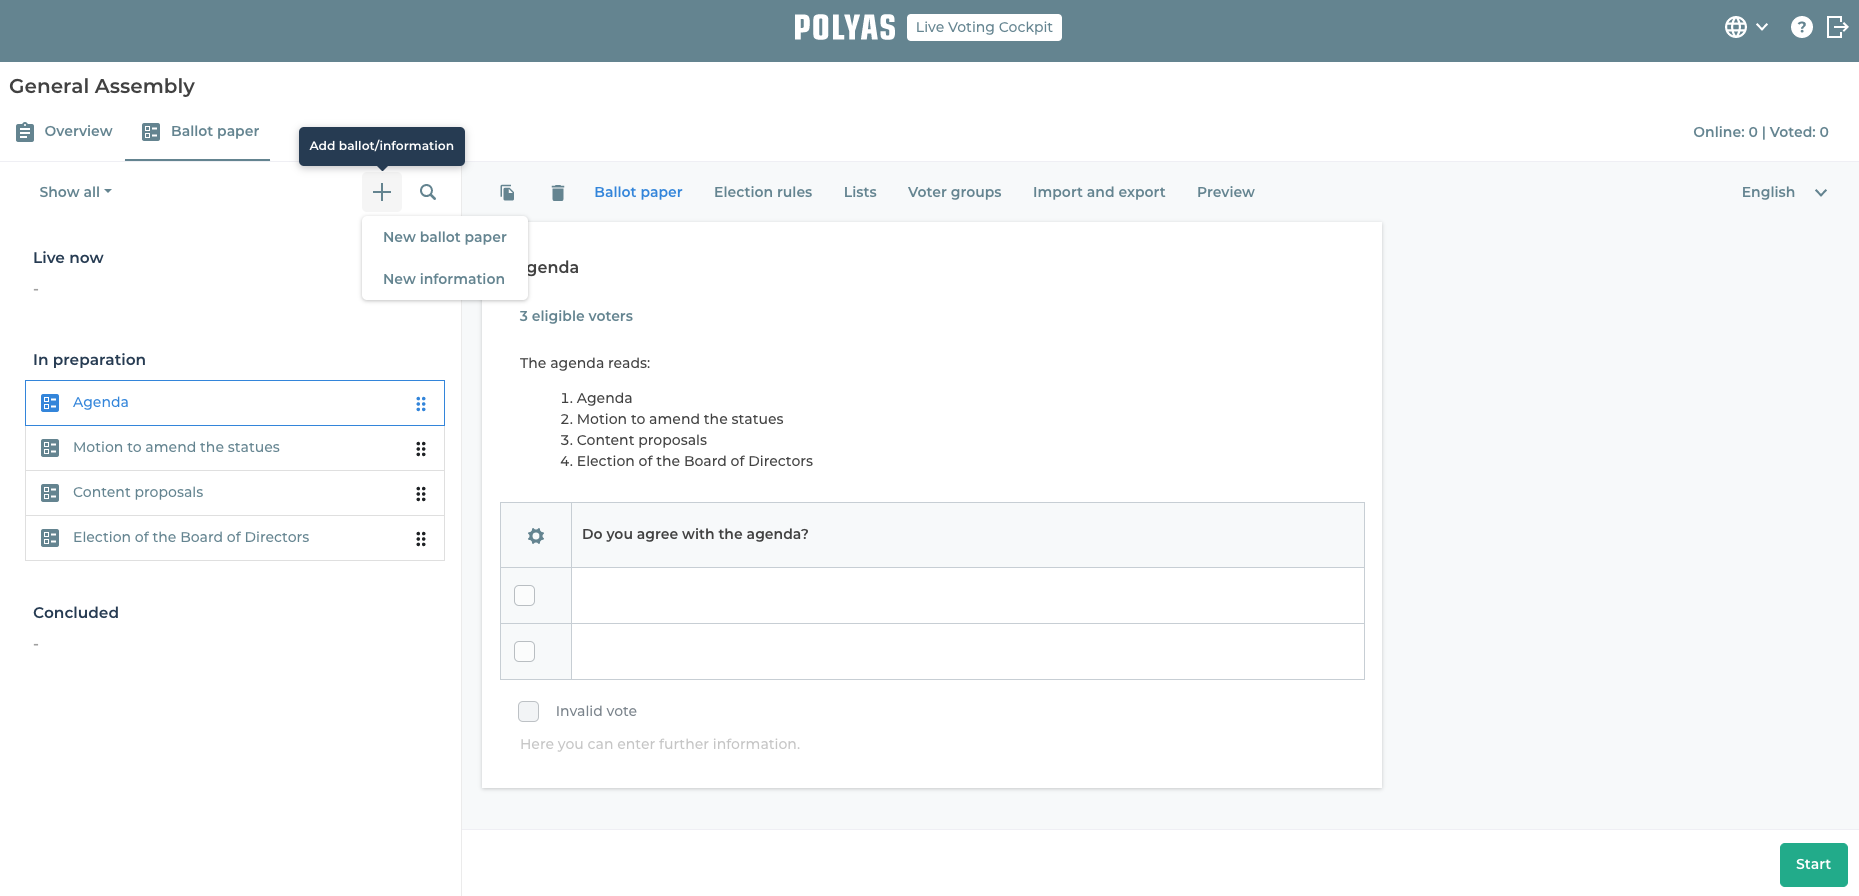
Create ballot papers and information
Click the “Ballot paper“ tab. On the right-hand edge of the screen under the heading “In work” you will see all the ballot papers that you created with the Online Voting Manager. You can edit these here. You can also create new ballot papers, change the order they are displayed in, or even delete them.
Learn more about editing ballot papers here >
You can also include information for your voters. To do this, click on the plus icon and select “New information”. In the text editor that opens now, you can type in and format new information about your vote. For example: “A 15-minute break follows. We then continue with the next vote.” Then click on “Save” at the bottom right.
Newly created information and the ballot papers are displayed on the left-hand side under “In work”. You can create as much information as you like and integrate it into your schedule.
Starting and ending voting and information
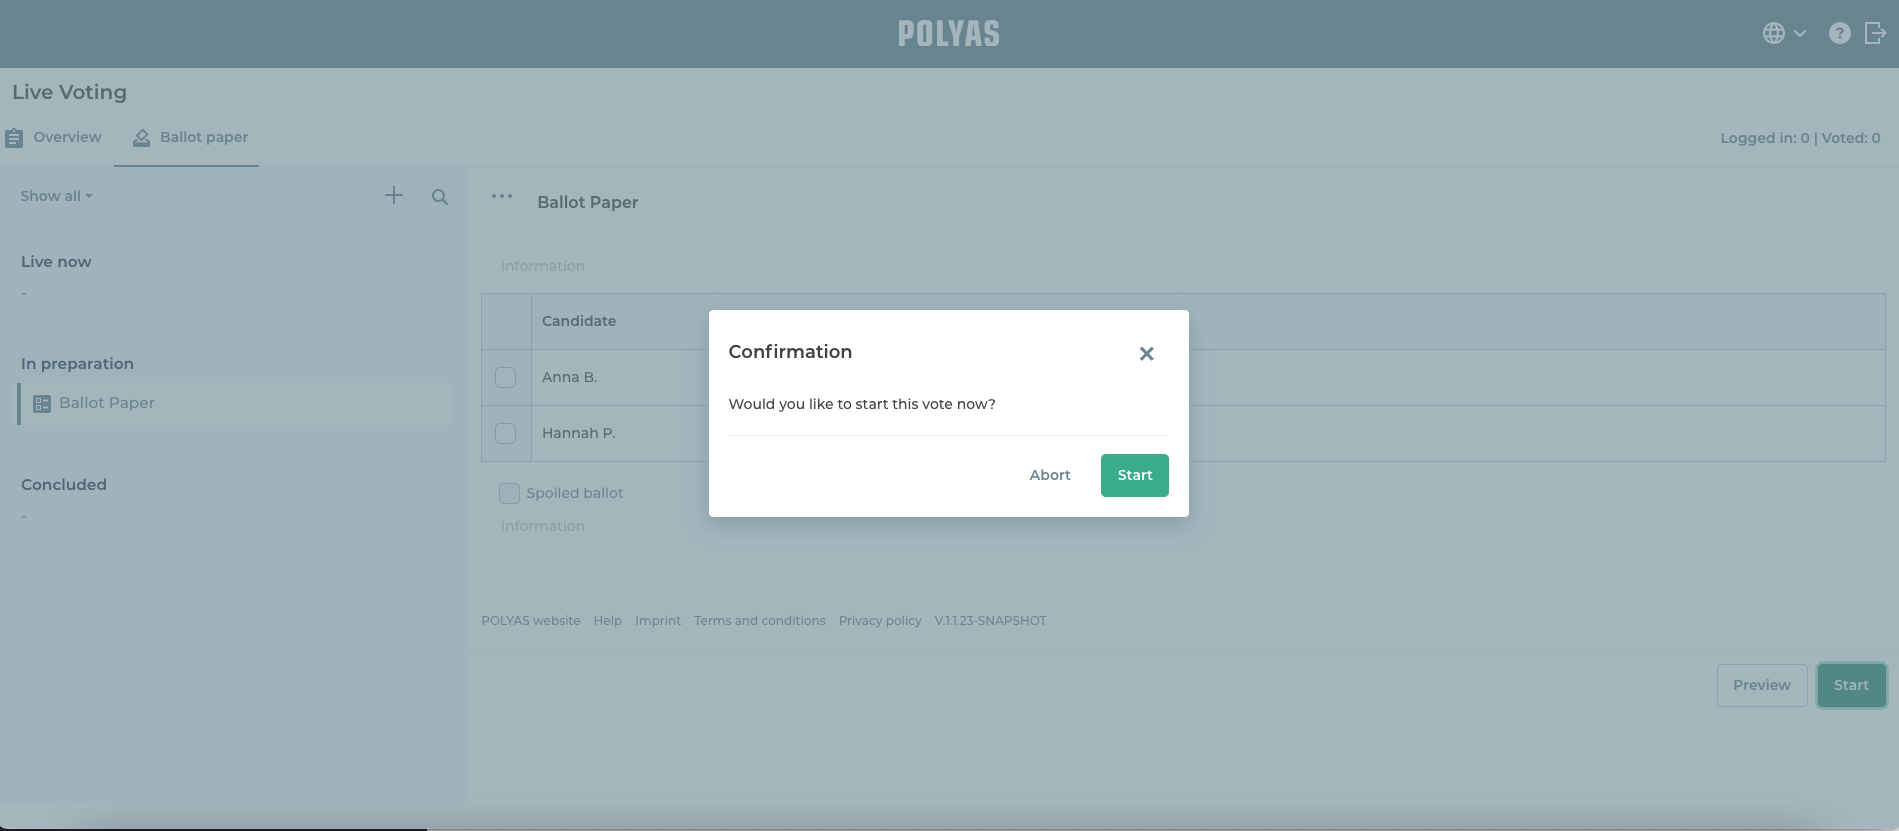
Now select the ballot paper or piece of information that should be displayed first to your logged-in members. To begin voting, click “Start”. The selected ballot paper is now displayed to everybody taking part.
Find out exactly how Live Voting works here!
You decide how long voters have to make their choices. As soon as you want to end the voting, click on “Stop”.
To display information, proceed in the same way, select the desired information on the left, and click “Display” at the bottom right. Unlike ballots, you do not have to stop the display of information. To continue, you simply start the next round of voting and the displayed information is replaced by the ballot paper.
Present the result
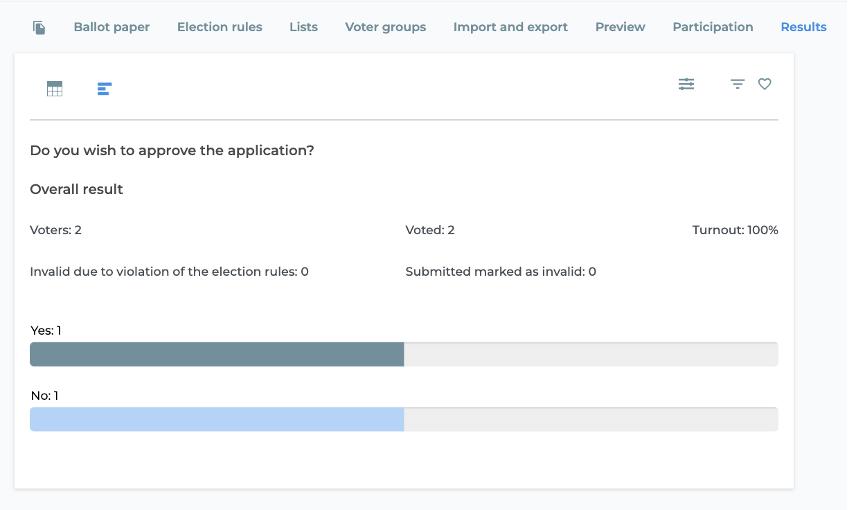
You can then publish the result of the vote directly. To do this, select the ballot on the left-hand side of the screen under the heading “Completed” whose result you want to display to your participants and then click on the “Results” tab. You will see the evaluation of the ballot paper. You can adjust the display format of the results above the ballot paper. Depending on the type of ballot paper, you can click on the table icon or the bar icon on the right to define whether the results should be displayed as a bar chart or a table. You can use the slider icon on the right to show quorums and majorities and use the filter icon to define the sorting of the results.
You will also find a heart symbol to the right of the filter symbol. You can use this to define your personal favorite settings for live voting results so that you do not have to make all the settings again for each ballot.
Click on the heart. If it is filled in gray, you have saved the currently set result display as a favorite. This favorite setting will now be applied directly to the next completed ballot paper. This allows you to display the results to your voters even more quickly.
Note: The options you have for displaying results in the Live Voting Cockpit are closely linked to the ballot rules. In contrast to candidate elections, you cannot display the results as bar charts, for example, in the other voting form. If you have selected the bar chart as your favorite, this setting cannot be used for the ballot paper type “Other voting form” or “List elections”. In such a case, our default settings are preset.
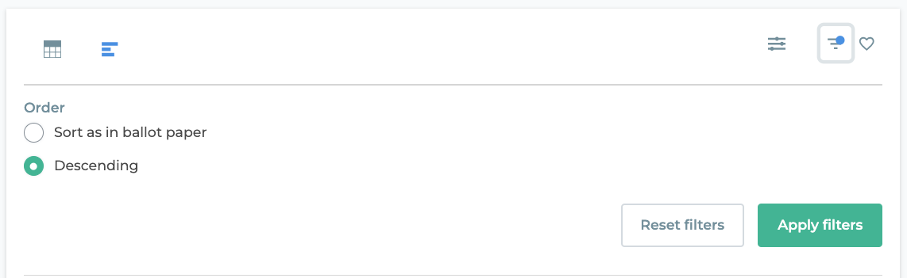
Filter and customization options for results in the Live Voting Cockpit.
Then click on the green “Show results” button at the bottom right. The voting results can now be seen by all logged-in voters. If you would like to change the way the results are displayed again, return to the ballot paper, change the settings, save them again if necessary and click on “Show results” again.
You can find detailed information on the turnout in the “Turnout” tab.
After displaying the results, you can continue with the presentation of further ballot papers or information.